How to remotely manage a standalone Hyper-V Server 2008 R2
In this article we will explain how you can remotely manage a standalone Hyper-V Server 2008 R2. The standalone Hyper-V 2008 R2 is also the free Hyper-V server which can not take any other roles and can only be the baremetal hypervisor. Also, Hyper-V 2008 R2 standalone server has no GUI and can be managed from the console using a command line interface only. If you are interested in knowing what are the differences between the free and paid version of Hyper-V, check out our article about it here. While there are other ways of managing Hyper-V remotely using paid and advanced tools like SCVMM, we will primarily be showing how to administer your Hyper-V Server using the free RSAT (Remote Server Administration Tools) installed on a Windows 7 machine. RSAT (Remote Server Administration Tools) are a free download from Microsoft and can be installed on the professional, ultimate or enterprise versions of Windows 7 or Windows Vista. Here is a step by step article on how to install RSAT on your machine.
Before installing RSAT, prepare server to be remotely administered:
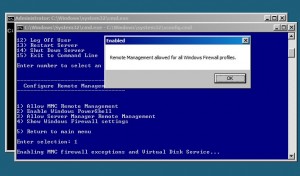
Before we could go ahead and demonstrate how to use RSAT for remotely administering Hyper-V 2008 R2, we need to make sure that the Remote Administration has been allowed on the Hyper-V using its command line interface on the server. This means MMC remote management as well as Allow Server Manager Remote Management (in order for Server Manager Remote Management to work you also need to Enable Windows Powershell). You can enable all three of these options at once from the command line interface on the server, by choosing option 4 from main menu and then options 1, 2 and 3 from the “Configure Remote Management” menu. Please note that enabling options 1, 2 and 3 will need a reboot of your server. Check the image below:
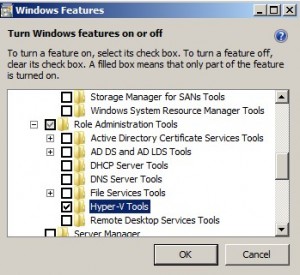
Enable and Install Hyper-V Tools under Remote Server Manager tools, from Control Panel -> Program and Features -> Turn Windows Features on and Off section
Gotchya if Server is part of a Workgroup:
We are now ready to manage our server using RSAT tools. Another thing you have to remember is that if the Hyper-V Server is not a member of a domain and is in a Workgroup. You must create a local administrator account with the same username and password on the server as the one you will be using while logged on from your Windows Seven machine, again, the username and password must be the same !. Since the server is in a workgroup, DNS might not be working properly to resolve the server name, in this case we need to note the IP address of the server so we can get to it remotely. Also, from experience I can tell that you would need to create a HOSTS file entry for the Hyper-V server on the remote machine so that the server’s name can resolve to an IP.
Enable FireWall rules on Hyper-V Server:
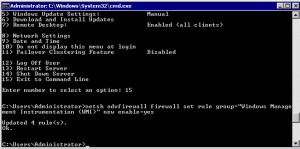
Choose option 15 on the menu on the Hyper-V and drop down to a command prompt. There give the following command exactly so that firewall can allow communication:
netsh advfirewall firewall set rule group=”Windows Management Instrumentation (WMI)” new enable=yes
It Should come back and say updated 4 rules, see image below
Add the local administrator user you created on the server to the Distributed COM Users localgroup:
Run the following command exactly (replace the user by nameofyourserver\username by appropriate and do this on server console, not via remote desktop)
net localgroup “Distributed COM Users” /add 2K8R2HV\koder
Configure the Client (Machine where you will be using Remote Tools from):
netsh advfirewall firewall set rule group=”Windows Management Instrumentation (WMI)” new enable=yes
It should come back and say 8 rules updated
Run the following command to allow firewall exception for MMC on the Cleint Machine:
Netsh firewall add allowedprogram program=%windir%\system32\mmc.exe name=”Microsoft Management Console”
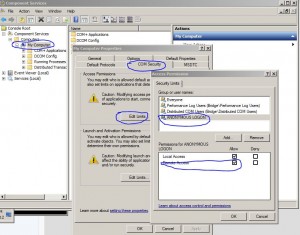
Adjust DCOM permissions on the client by doing the following:
1. Click on the start button, in the Search box type dcomcnfg , hit ok
2. Component Services\Computers\My Computer, select My Computer, right-click, choose properties and select the COM Security tab
3. Click Edit Limits in the Access Permissions area then click ANONYMOUS LOGON from the list of users, grant Remote Access/Allow permissions
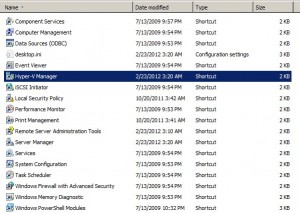
Finally Launch Hyper-V Manager from Control Panel –> Administrative tools section:
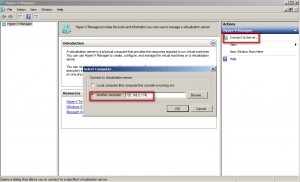
When Hyper-V Manager launches, click on Add Server and provide the IP address of the Hyper-V server you want to manage
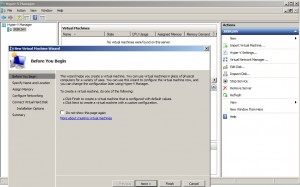
Now you can perform functions on the remote Hyper-V server such as adding a virtual machine by right clicking the server name in the left pane and then New -> Virtual Machine and following the wizard to add a virtual machine.
Credit: This post helped a lot in my troubleshooting of the remote connectivity issues




[…] How to remotely manage a standalone Hyper-V Server 2008 R2 […]