How to run HyperV in a virtual machine
If you are wanting to learn virtualization, you most probably will need a small virtualization lab set up. In most cases, to set up a virtualization lab, you would need to use additional hardware. If you want to experience baremetal virtualization with products such as VMWare vSPhere, Microsoft Hyper-V or Citrix Xenserver you will definitely need additional hardware especially for setting up scenarios or learning advanced features such as vMotion, Live Migration, Fault Tolerance etc. You can still however setup a virtual environment where you can emulate these baremetal hypervisors, you may not be able to test for advanced capabilities such as FT (Fault Tolerance). In this article we will show you how you can setup Microsoft’s Hyper-V server in a virtual machine. This way you can still learn virtualization without actually having to spend money on additional hardware.
Our setup will include setting up Microsoft Hyper-V standalone server which you can download for free from Microsoft, note that this is not the evaluation version which will expire, it is the free baremetal hypervisor hyper-v standalone version which has only a command line interface and it can only have one role, one being of Hyper-V. However, essentially the setup will be the same for full install of Hyper-V which comes packaged with Microsoft Server 2008 R2 SP1.
We will be using VMWare Workstation 8 to demonstrate this setup, you can download a free evaluation version of VMWare Workstation 8 from VMWare’s website. You can also check out our post about how to install and set up VMWare Workstation 8.
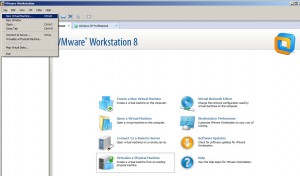
Step 1: Launch VMWare Workstation 8 and click File and then New Virtual Machine
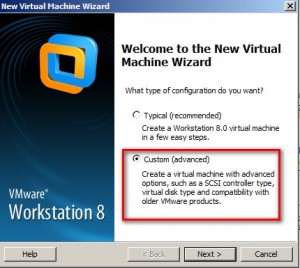
Step 2: Click on Custom -> Advanced
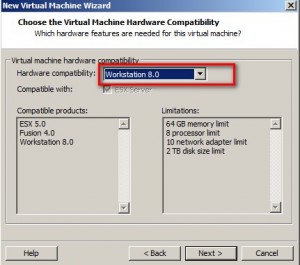
Step 3: Choose Workstation 8 for virtual machine hardware compatibility
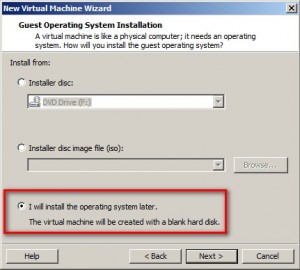
Step 4: Choose I will install Operating System later
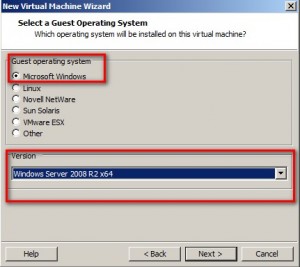
Step 5: Choose Guest Operating System to be Microsoft Windows and choose Windows Server 2008 R2 x64 from the drop down box.
Step 6: Provide a virtual machine name and directory to store it in
Step 7: Choose number of processors and then number of cores per processor, on a minimum you should choose one processor for the virtual machine and 2 cores, so a total of 2 processors available to your Hyper-V you are going to setup as a virtual machine
Step 8: Because you are going to be running HyperV as a virtual machine, the performance for your VMs running inside Hyper-V will definitely be degraded, however to compensate that you can alott more memory to your VMs. Since you will be giving your VMs more memory you need your virtual Hyper-V server to have more memory, so in this step allocate atleast 6GB or more RAM to your HyperV VM.
Step 9: If you want that the virtual machines that are hosted inside of your HyperV virtual machine have access to the internet etc, choose bridged networking for the networking
Step 10: Choose the default for the type of SCSI controller (LSI Logic SAS)
Step 11: Choose to create a new virtual disk and choose to allocate all disk to a single file.
Step 12: Choose a name for the Virtual Hard Disk File or let it be default
Step 13: Click on Customize Hardware and remove floppy disk and sound card. You can also choose the DVD to be an ISO file. In our case we chose Windows Hyper-V server 2008 install CD iso file to be the DVD drive emulation
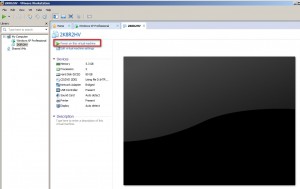
Step 14: Click Finish for configuring the VM then from VMWare Workstation 8’s menu highlight the Hyper-V Virtual Machine you just created and press the play button to power up the HyperV virtual machine
Follow steps now as instructed on the screen by Windows HyperV Server 2008 guided setup. If you need to check out a step by step article on how to do this, check out our article on how to install the stand alone version of Microsoft Hyper-V server 2008.


